Pages

Wednesday, 28 January 2015

Entwined Hearts

Good morning to you

what a lovely weekend I have had so relaxing and very much needed.  Today I have made quite a generic card which I suppose could be used for many occasions just by adding a sentiment for that occasion, so I have used the

Heart Rose Vine

from the new release by Wild Rose Studio


Quite CAS for me and no ribbon in sight.  I used my baby pink pearlescent card for the base layer and then some white embossed card for the top on the A2 sized card.  I cut two of the hearts in the baby pink and cut one to allow me to entwine them.  I then added some little pink blossoms to the rose heads on the die followed by four small pink pearls one in each corner.

Don't forget my current WRS candy in the side bar

I would like to enter this card into the following challenges

The Craft Place - Love and Valentine
We Do Doobadoo - Romance
In the Pink - Pink and Pearly
Bunny Zoe - Hearts

hugs
Kate
xxxxx

Thursday, 22 January 2015

Just a Note Crafty Ribbons New Range of Ribbons

Morning all

Multi tasking today lol, actually it is my day to inspire you with those gorgeous products from


but I could not resist using those lovely New Release dies from


as together they were perfectly complimented.

here is my card for today


I have gone with a black and white theme as this new ribbon just shouted out for it

The ribbon is 


from the New Range
I used black as the first layer the white embossed top layer the new frame from WRS a computer generated sentiment as I could not for the life of me find my stamp and then a few pearl drops to finish it off, okay I used quite a lot but thought it worked well myself.

I would like to say hello to my new followers and thank you to my wonderful visitors, who leave such inspirational comments and those allow me to come visit you too

Don't forget I have WRS candy running in my sidebar if you have not already entered, I would love for you too.

hugs
Kate
xx

Wednesday, 21 January 2015

Thanks

Good morning to you

I am back today to share with you another idea for those

Wild Rose Studio 2015 New Releases

I have gone with the smaller of the

Antique Art Frames

with this delicate Thank you card


With this card I haven't used any distress ink but used some of my baby pink pearlescent card my new butterfly embossing folder my older swiss dots embossing folder, some lovely gingham pink ribbon, for the die I ran it through the pink twice and then in the white, I layered up the pink for some depth and then added the flourishes in the white.  I added a rhinestone button on the double layer double size bow and some pearl dots on the corners of the die. Nothing to fancy I thought.

The ribbon can be found at Crafty Ribbons Here

Don't forget the current WRS candy in my side bar, oh and the Wild Rose Studio blog has some candy too hop here if you have not entered that one yet.

I would like to enter this one into the following challenge

TuesdayThrowdown - Embossing

hugs
Kate
xxxxx

Wednesday, 14 January 2015

Get Well Soon New Release WRS Die

Good morning to you

I am back today to introduce to you another of those

Wild Rose Studio 2015 New Releases

and I am introducing you to the gorgeous

Butterfly Cascade

with this soft get well card


I started this card with all white card stock. The base layer I edged with the Squeezed Lemonade TH Distress Ink, then I inked up the inside of the embossing folder and then ran my panel through to get this lovely soft effect.  I used one of my rectangle MFT pierced dies to cut a panel which I then ran through the swiss dots embossing folder, I distressed the edges on this.  I then cut the die and glittered it up, before adding a flurry of little punched butterflies following the flow of the flourish die.  I added liquid pearls to the bodies of the butterflies and to some of the spaces on the embossing, before adding my double layer triple size bow with that diamante button.  The sentiment is cut from the smaller MFT die and edged the same, before sticking this down I curved it for some more dimension.

Don't forget the current candy in my side bar

I would like to enter this one into the following challenges

Cuttlebug Mania - It takes two (two embossing folders)
Papertake Weekly - It's all New
Craft-Dee BowZ - Anthing Goes with a handmade bow
Simon Monday - Inky Background (used TH DI Squeezed lemonade in the embossing folder)
Cute Daisy May - Anything Goes

hugs
Kate
xxxxx

Tuesday, 13 January 2015

Wild Rose Studio 2015 New Die Release Candy

Good morning to you all

As a treat with this new release, one lucky person will be able to win this gorgeous die


So what do you need to do to win ?
you must be a follower of this blog to win the candy as it is a thank you for one of you,  
remember to place the photo on your sidebar
please only enter once to make it fair on everyone. 
Mr Random will choose the winner after checking the above criteria has been met, so leave your link with him please
No candy only blogs please
This candy will remain open until the the 
2/2/15 @ 5pm

hugs Kate xx

Monday, 12 January 2015

It's a Boy with the Wild Rose Studio New Releases

Good morning to you

I am back today to introduce to you another of those

Wild Rose Studio 2015 New Releases

and I am introducing you to the gorgeous

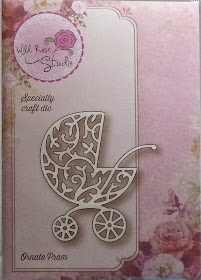
Ornate Pram

I started this card with all white card stock.  I used my shattered glass TH Distress Ink to ink up the inside of the embossing folder and then ran my panel through to get this lovely soft effect.  I distressed the bottom layer to match, before cutting out two of my nestie squares and inking through before removing the dies.  The pram was cut through once in white and once in blue, I then pieced it all together to get this gorgeous effect.  I finished off by adding a triple layer triple sized bow, an angel charm, a tag with the sentiment on it along with a blue rhinestone sparkler, a distressed white rose, some foliage and added a few pearls to complete the look.

Hope you like this one, can see it coming back soon in a baby girl theme.

I would like to enter the following challenges

Crafts for Eternity - blue tones
Really Reasonable Ribbons - Look what I got with ribbon
Thats Crafty Challenge - Blue is the colour
Wags N Whiskers - Anything Goes
Allsorts - New and Cute
Simon Wednesday - Something New

hugs
Kate
xxxxx

Sunday, 11 January 2015

Happy Easter with the Wild Rose Studio 2015 New Release Dies

Good morning to you

I am back today to introduce to you another of those

Wild Rose Studio 2015 New Releases

and I am introducing you to the gorgeous

Woodland Posy

with this sweet pastel Easter Card

I also used one of the older frames

The Oval Frame


This card has been made using white card and TH DI Liking Purple in the main.  I folded my A4 card stock in half to create the card base then created two layers with the white card stock.  I distressed the edges of the first layer and then used my brayer to colour the inside of the embossing folder before running my card and the embossing folder through the grand calibur.  I love the look you get using this method.  I then cut two white oval frames, one I left white and the other I distressed fully in the lilac.  I layered these up one horizontally and the other vertically, so that the lilac one was on top.  I added my woodland posy die to this, before finishing off with a hand cut banner some distressed white ribbon, a charm, fancy button and a little rose.  I completed the look with some liking little pearls in lilac and also in white.  The ribbon here is a triple layer triple size bow.

I would like to enter this card into the following challenges

Creative Craft Cottage - Anything Goes
Die Cut Divas - Anything Goes
Dies R Us - Anything Goes with a Twist of New Dies
Wags N Whiskers - Anything Goes
Simon Wednesday - Something New

hugs
Kate
xxxxx

Saturday, 10 January 2015

On Your Wedding Day

Good morning to you

I am back today to introduce to you another of those

Wild Rose Studio 2015 New Releases

and I am introducing you to the gorgeous

Wedding Cascade
and
the smaller of the
Antique Art Frames


I am loving working with these gorgeous new dies.  For this one I have used guilding flakes on the base layer and I have used the wedding cascade die to create a raised aperture.  I then used the cut die to place through the aperture so they sit on the guilded back sheet.  I then added the little ornate art frame this was cut in white and then the sections separated.  I guilded the full frame and then glittered up the additional layer cut outs before adding them to the frame.  This was raised up with foam pads, before I added the required triple layer double gold bow, little button, flower and charm to complete.  To finish I have added pearls and bling to the die.  Love how the ring looks with the bling on top of it.

I would like to enter this card into the following challenges

Simon Wednesday - Something New
Really Reasonable Ribbon - New Stash with Ribbon

hugs
Kate
xxxxx

Thursday, 8 January 2015

Let's Get Sentimental with Crafty Ribbons

Good morning to you all

Today is the first challenge of 2015 over at


where our lovely Lynsey has chosen the theme of


Let's Get Sentimental

so here is my first 2015 inspirational piece for the Crafty Ribbons Challenge


I made a Mother's Day Card


I used an embossing folder and distressed the edges in TH Peeled Paint distress ink.  I used my foam pads to layer up those gorgeous fancy oval dies.  The larger of the dies I left in the die and embossed it with Swiss dots to allow me to use the indentations to place a tiny rhinestone in each, great spacing technique. I distressed the smaller oval whilst in the die to frame the sentiment softly.  I wrapped the triple layer triple sized bow around the sides of the card and finished off with a rhinestone heart button and some rhinestone flourishes.

I would like to enter the following challenges

Card Mania - Make it Sparkle
Craft-Dee Bowz - Anything Goes with hand made bow
Through the Purple Haze - Anything Goes
Simon Wednesday - Something New (New way of creating cards for me anyway)

hugs
Kate
xx

Wednesday, 7 January 2015

New Release - Happy Mother's Day

Good morning to you

I am back again today to share with you another of those gorgeous

Wild Rose Studio New Releases

so introducing you to the beautiful

Antique Art Frame


I started off by inking the inside of my embossing folder with TH distress ink Teal.  I then cut the embossed sheet to fit the card blank which is an A4 white card folded in half.  I ran the frame die through the grand callibur twice, this created half of the layers needed to complete my dual tone frame.  I ran it through another twice to complete my contrast corners.  I brayered the bottom frame along with the four sets of layers and one set of the dots in the teal.  I used my foam pads to layer the white frame on top of the teal frame and then used my glue pen to layer on the contrast pieces.  Once this was all dry I added some nestie leaves some Britannia roses with some pearl brads inside them and a sentiment strip, all finished off with some white pearls and for those that know me - not a ribbon or bow in sight :)

I would like to enter this card into the following challenges

Papertake Weekly - Anything Goes

hugs
Kate
xxxxx

Tuesday, 6 January 2015

Wild Rose Studio New 2015 Die Release

Good morning to you

Today is a very special day as this is the first 

New Release 

of 

2015

for 

Wild Rose Studio

so here for you is the full overview of those new releases


I just could not wait to get started with them and decided to introduce you to the

Heart Rose Vine

first

with this sparkly Engagement Card


To make this card you will need some double sided adhesive sheets.  I cut out my white centre card and then placed the double sided adhesive sheet onto this.  I then ran it through my grand callibur with the die sitting on the adhesive sheet.  It will not cut all the way through which is perfect, if you do get a couple of areas that do, then just add tape to the back of your card stock to hold the die and out cuts in place.   Now taking your embossing duster bag, run it over the whole piece and be careful where you place your hands, I dust my hands too.  Take out the double sided adhesive sheet where the red area's are, I use a pin to do this.  You then sprinkle this area with your red fine glitter, rub it in and dust off the excess with a large blusher brush.  Once the red glitter over spill is back in it's pot, burnish the glitter, by rubbing on it the warmth of your finger will change it from glitter to a lovely soft shiny area.  Then take out the black area of the die and do the same, before moving on to your white glitter. 

Once you have done this you can layer up your card and decorate with your embellishments.

I love the effect that this gives, a beautiful way to showcase the die, don't you think.

I would like to enter this card into the following challenge

Glitter and Sparkle - Anything Goes

hugs
Kate
xxxxx

Monday, 5 January 2015

Wild Rose Studio 2015 First Die Release

Good evening everyone

Just had to pop on and shout this out for you all

The first release of New Dies for 2015

of 

Wild Rose Studio

is out, here is the full overview


and you can see more 


hugs Kate
xxx